12v Wire thickness

Bart

Free Member
Joined
Jun 4, 2016
Posts
3,188
Likes collected
1,398
Location
Northern Ireland
Funster No
43,436
MH
Boxer L4H2 van build
Exp
Since 2016
is 14 AWG ok to use throughout the MH in a van conversion or is that to small or to thick.
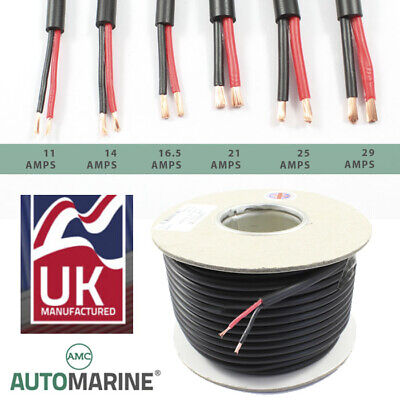

or where is a good place to buy wire from as ill just buy a 100 mtr roll
 
This site contains affiliate links for which MHF may be compensated.
You gonna need various thicknesses, serving different needs in your van. Water pump needs 4mm2, compressor fridge the same, lighting can be 1mm2 or less, 12v sockets needs at least 2,5mm2, and on the charging side you may need 10 or even 16mm2. I would not buy a 100m of the same, you will use only a portion, then buy more for other stuff. Have a rough plan on what you going to power, then calculate lengths of each thickness.
 
Thanks Raul Im surprised at the compressor fridge getting away with as low as 4mm2 , would you rec me just getting single core cables and then protecting them all in that black plastic corrugated pipe tubing , or stick with 2 core cables.
 
You only need single core for the bulk of the wiring as the van body/chassis act as “return” for the negative.

Using a variety of colours makes the work very much easier and any fault finding or updates will be simplified.

Protecting wires can be good but be aware of the risk of cables rattling in the conduit and of movement against each other causing abrading of insulation and long term degradation.
 
The diameter of the wire is based on not only the current carrying requirement but the distance it has to carry it.

There are plenty of calculators on the internet. This is the first one that came up that looked half decent. I am not recommending this one specifically as I haven't checked it. But it is an example.


REMEMBER: Fuse each wire with a fuse that matches the rating of the wire. A fuse is not there to protect the appliance it is there to protect the wire.

Subscribers  do not see these advertisements

 
You only need single core for the bulk of the wiring as the van body/chassis act as “return” for the negative.
I'd be interested to know how many people do this. Is it common?

My view - if you're building from scratch, put in the ground return wire, and be done with it. In other words, two cables, not one. Take all the returns back to a bus bar near the battery, and make sure that the bus bar has a good connection to the chassis.

There are several potential issues with individually chassis grounding your 12V kit. The most obvious one is that it may be difficult to ensure that you get a good electrical connection - you've got to find a chassis point, sand off the paint, use dielectric grease, make it mechanically sound, and keep an eye out for corrosion. There are less obvious issues - there may be a mix of metals in the chassis, and you don't want to pass current through them, or you may get feedback loops, or whatever. I don't see the point if you can just get it right to start with.

OTOH, a good chassis connection will have marginally lower resistance than a 10' cable back to the battery, but I can't see this ever being a real benefit.
 
I have run twin wire the hole van, and where a single like a 4-6 or higher, each circuit has a return -ve to the distribution bus. I did use flexible conduit where wires passes trough metal, raped in cloth tape and zipped tight. Each hole on metal has grommets. I hate to dig the wall out to repair a chafing damage. I posted a timeline of my built on self build section here, titled crafter self build.

Here is a link, it may give you ideas for certain things on your build.
 
Last edited:
I'd be interested to know how many people do this. Is it common?
Yes, most of the self-builds I have seen follow this approach and it is the same one adopted by the van manufacturers. The three advantages seem to be:
  1. Reduced cost and weight by eliminating unnecessary wires
  2. Simpler installation to create, maintain and update
  3. Lower resistance of the overall circuit
For this to be implemented successfully, you need to find and prepare a few points around the build where you can achieve a sound mechanical and electrical connection. The earth returns can then be routed to the nearest of these rather than doubling the wire all the way back to the power distribution point. If you are not confident in being able to do this, then the twin cable approach might be your only option!
 
Sorry for the delay in replying here , been super busy :) some very useful feedback , thanks for the info
The diameter of the wire is based on not only the current carrying requirement but the distance it has to carry it.

There are plenty of calculators on the internet. This is the first one that came up that looked half decent. I am not recommending this one specifically as I haven't checked it. But it is an example.


REMEMBER: Fuse each wire with a fuse that matches the rating of the wire. A fuse is not there to protect the appliance it is there to protect the wire.
cheers Gromett ill bookmark that calculator.

Subscribers  do not see these advertisements

 
Sorry for the delay in replying here , been super busy :) some very useful feedback , thanks for the info

cheers Gromett ill bookmark that calculator.
I am not recommending that one specifically. I have not checked that it is correct or anything. Was just an example of what to look for.
 
The approach taken on my van is to run a 10sqmm wire up each side of the van used for all earths. It connects to the battery main earth.
 

Join us or log in to post a reply.

To join in you must be a member of MotorhomeFun

Join MotorhomeFun

Join us, it quick and easy!

Log in

Already a member? Log in here.

Latest journal entries

Back
Top