Peugeot Boxer PVC 2016, how to change battery?

Joined
Jan 1, 2017
Posts
1,161
Likes collected
2,618
Location
eastbourne
Funster No
46,681
MH
van conversion, Peug
Exp
4 years
Happy Christmas all, went outside to take the van for a run out after two flat battery ( vehicle) incidents this week. I use the van as a daily driver as well as a motorhome and it looks like the battery has had it .
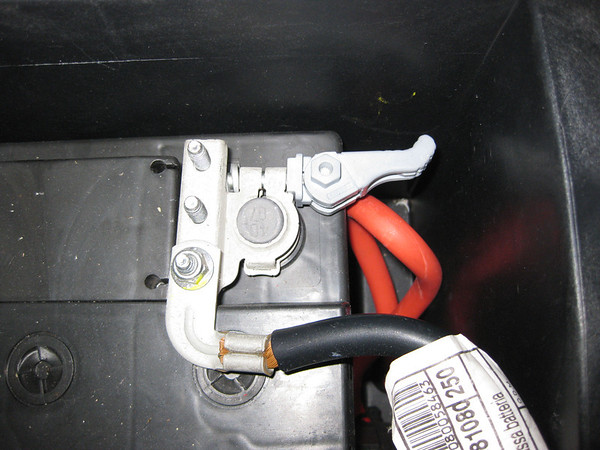
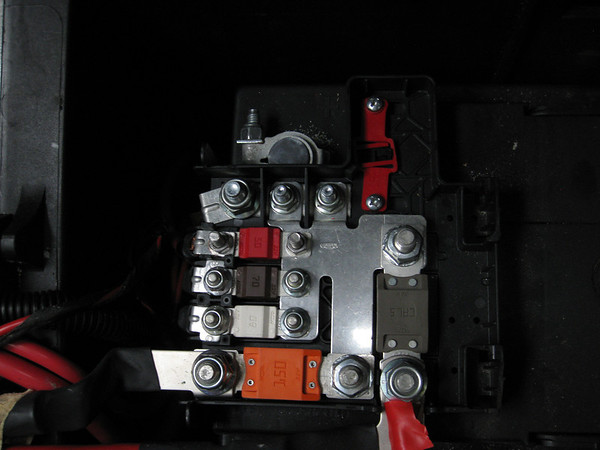
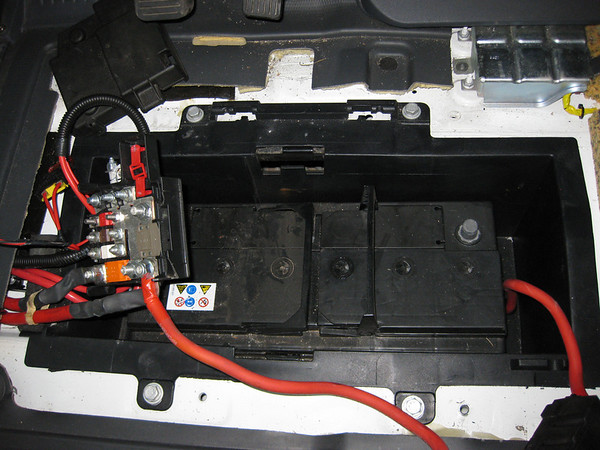
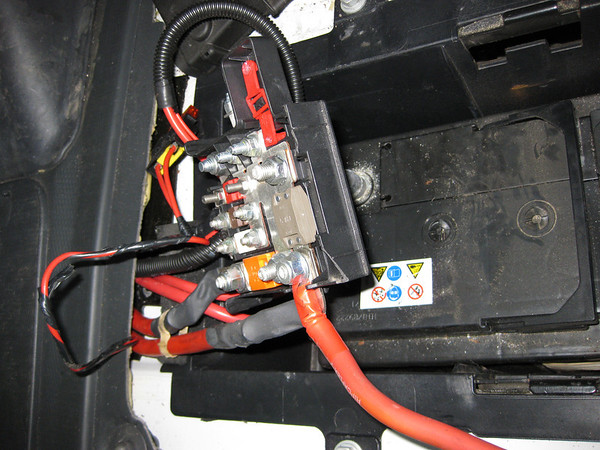
opened the cover and wasn’t expecting all of those the wiring connections, (see photo)phew.sooooo, How do I change the battery, numpty question I know but I’ve no idea! What is that black plate with wiring all over it? The neg terminal is attached by a clip on to a ‘post’ .
I cant see a battery name type anywhere for a replacement but does anyone recognise it or can suggest a best replacement.?
Thanks in advance!👍
 

Attachments

  • 23D48E6C-4F25-475B-8D30-9548123CAD95.jpeg
    23D48E6C-4F25-475B-8D30-9548123CAD95.jpeg
    328.6 KB · Views: 1,285
Loosen the nut at the bottom right of the pic on the Pos post being careful not to let the spanner touch and metal. .
Loosen the nut at an angle upwards on the Neg post.
Lifting both plates will reveal the disconnected battery... May need a bit of a twist to break free of the post and remove the Neg plate first... All the wires will remain connected to the clamps.
Secure both out of the way then lift out the battery after removing any hold-down fixings.
 
Last edited:
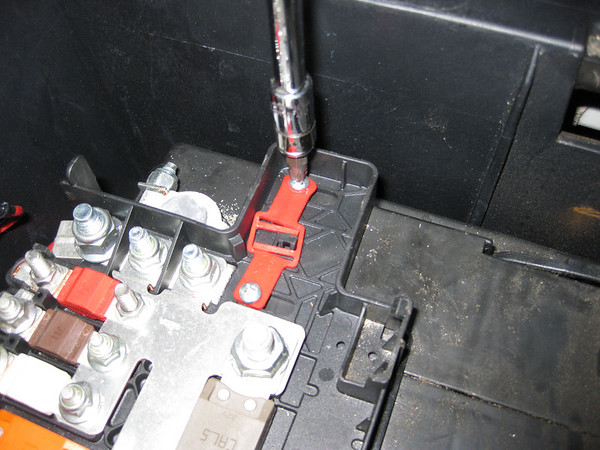
Don't forget to release the +pos assembly by unscrewing the 2 cross-head screws on the immediate left of the +pos clamp - the red pastic bit
Screenshot 2020-12-25 at 16.56.30.png
 
So helpful , thanks, will get on it tomorrow now as the lights just gone ....merry christmas
 
Wasn’t expecting to see all that on top!

Subscribers  do not see these advertisements

 
Don't forget to release the +pos assembly by unscrewing the 2 cross-head screws on the immediate left of the +pos clamp - the red pastic bit
View attachment 451277
Why?
They are screwed into the plastic tray and will come away with everything else when the tray is lifted off after the Pos post clamp is removed
 
Why?
They are screwed into the plastic tray and will come away with everything else when the tray is lifted off after the Pos post clamp is removed
I thought these were positioning screws @papajohn ?
 
The nut and threaded bolt that faces north south to the right of the photo above releases the positive side of the connectors from the terminal post on the battery.
Screenshot_20201225_173016.jpg

Subscribers  do not see these advertisements

 
The pic below shows the receptor threaded holes for the +pos tray assembly at the left of the +pos terminal.
Screenshot 2020-12-25 at 17.33.04.png
 
I was certain they screwed directly to the battery top?
That is how mine is with the two screws going through the red plastic into the casing, I think they are to support the multi-connector terminal plate. You need to remove them as well as loosening the terminal to be able to move the plate away from the battery .
 
The nut and threaded bolt that faces north south to the right of the photo above releases the positive side of the connectors from the terminal post on the battery.View attachment 451280
That is how mine is with the two screws going through the red plastic into the casing, I think they are to support the multi-connector terminal plate. You need to remove them as well as loosening the terminal to be able to move the plate away from the battery .
Thanks Geoff C. - though I was going daft:xThumb:
 
...so the black bar across the middle is just a bracket/brace right? Just undo it?

Subscribers  do not see these advertisements

 
I was certain they screwed directly to the battery top?
I really can't see that, it's compromising the battery case for one thing and it's not needed for another.
Think of the result if someone lost them and decided they only had 2 or 3 inch screws....
The battery clamp should keep everything in place
 
The battery case is not compromised as the holes for the screws are there, on the correct battery, for that purpose, the terminal plate has many connections going to it and although the clamp alone will hold it the screws are there to support it and stop it twisting. They are not live and only go through the red plastic piece to clamp the plate to the top of the battery.

Subscribers  do not see these advertisements

 
I really can't see that, it's compromising the battery case for one thing and it's not needed for another.
Think of the result if someone lost them and decided they only had 2 or 3 inch screws....
The battery clamp should keep everything in place
Hi pappajohn the last couple of replacement batteries that I have recently fitted required the removal of these locating screws. I do agree if longer screws are used then damage to the battery could ensue.
 
Well, I stand corrected but why 2 screws? And why are the red plastic bits shaped as they are and overlapped when a single flat plastic strip or 2 washers would suffice
Or more beneficially just a locating lug as on many other sensible products?
 
If you have a cab radio that has a secure code have it to hand before you start
If your alarm has special instruction for resetting? either have the instructions or contact the supplier/installer

I encountered no problems and I had a residual voltage feeding back to the cab due to a Sterling BtoB being installed.

Be absolutely sure you have the correct replacement battery! physical size capacity and terminal configuration.

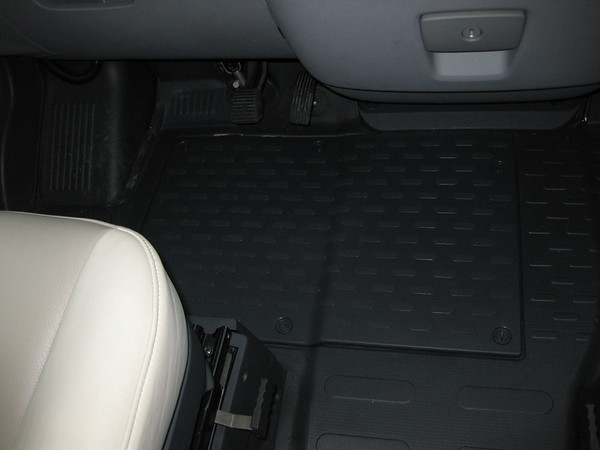
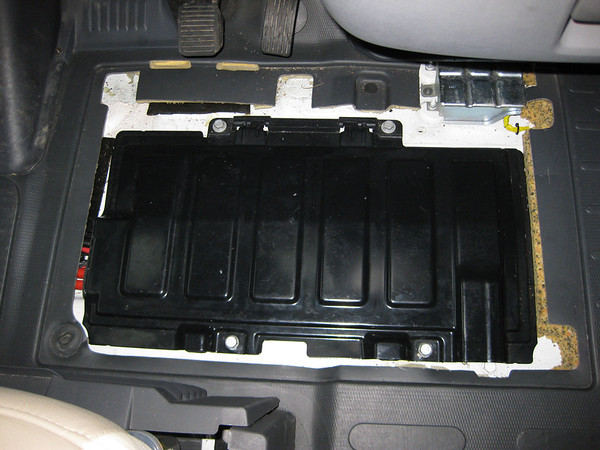
Remove the cab carpet and there is the floor panel with coin turn fixings a 50p piece is good, just half a turn on each
ONE-M.jpg

Now you have the battery box cover, just remove the two nearest 13mm bolts.
The lid hinges up and then pull it away from the hinges towards you.
two-M.jpg

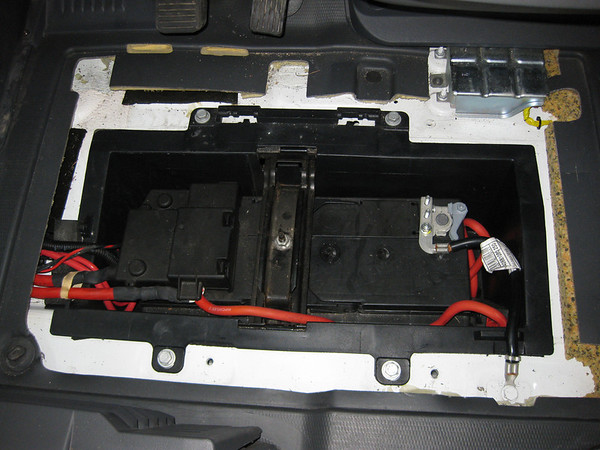
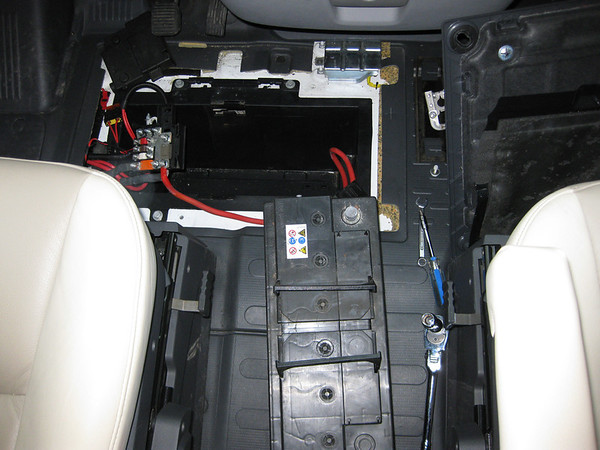
This is what you will find
three-M.jpg

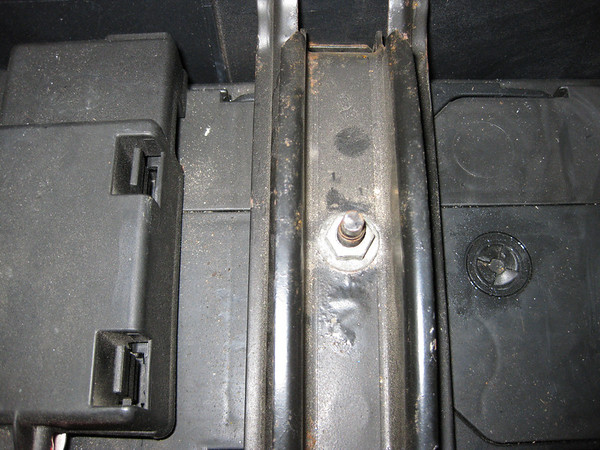
Now remove the battery clamp 13mm nut
four-M.jpg

Now disconnect the Negative clamp, no spanner needed here but best to remove the cable out of the way altogether by removing the 13mm bolt to the chassis also.
five-M.jpg

Now remove the terminal cover at the +ve end
six-M.jpg

Remove these two screws and the red plastic doobree lol
seven-M.jpg

Then slacken the +ve clamp nut 10mm ring spanner and lift the lot clear
eight-M.jpg

nine-M.jpg

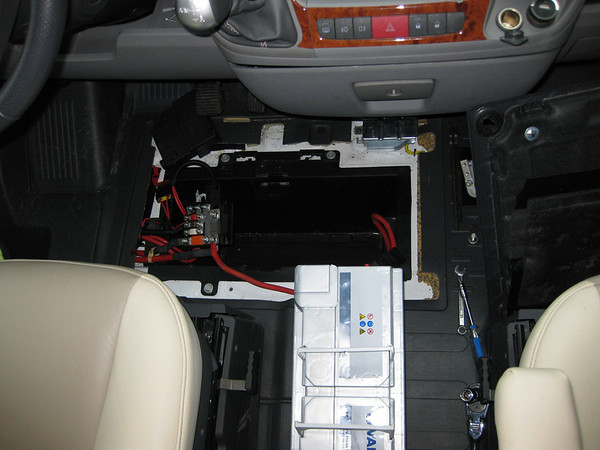
Pull out the old battery
ten-M.jpg

Present the new one
eleven-M.jpg

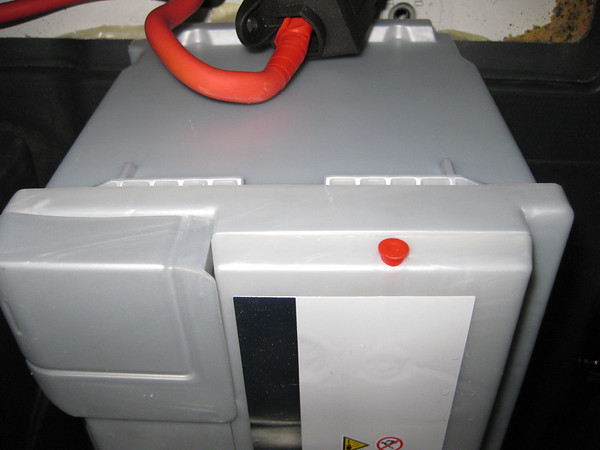
Be sure to remove both transit plugs
twelve-M.jpg

Reverse the whole procedure Amen

EDIT this is a left hand drive vehicle so do not be confused by that.
 
Or more beneficially just a locating lug as on many other sensible products?
The red doobrie is basically a pair of expansion plugs. I presume they are connected together so you don't lose them. You were spot on all the way
 
The screws through the red plastic don't screw into the battery itself,they expand the lugs into the holes like a rawlplug.

0B2F2A07-6FEC-4D98-9B20-475827556BA7.jpeg


Techno beat me to it 🙂
 
The red doobrie is basically a pair of expansion plugs. I presume they are connected together so you don't lose them. You were spot on all the way
Thanks Andy Techno it does seem overkill to me.
 
Also the negative terminal is normally quick release you don't need to undo the bolts just push the lever.
Found that when fitting new seat the other day... who knew? Great idea. Its a loooonnngg time since I changed a battery, vauxhall viva I think...🤔
 
If I'm doing anything with batteries, as I remove each of the cables I immediately tape it well out of the way with gaffer tape, no risk then of it moving or getting knocked onto the battery terminals etc.

Subscribers  do not see these advertisements


Join us or log in to post a reply.

To join in you must be a member of MotorhomeFun

Join MotorhomeFun

Join us, it quick and easy!

Log in

Already a member? Log in here.

Latest journal entries

Back
Top