Due to lock down we haven’t used the MH much recently
Ended up coating the roof with a liquid rubber solution, to date no more leaks. photos below of the finished result. More details on my flooring thread.
Added a PVC ceiling and change the interior colours a little, one last dampness issue to resolve in 2021
I have to say you have done a superb job both inside and out and it's really looking the part. Hopefully in the coming year you will get to enjoy it more.
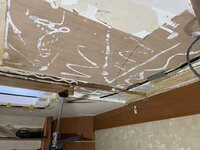
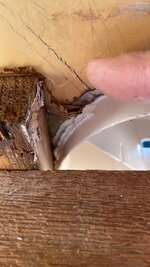
Fast forward to the end of 2022 and the roof leaked. After replacing the roof light sealant in the summer (just to be sure ). Decided to rip down the roof again - what a delight!
Also due to the shocking build quality and because I never want to do this again I’m going to over engineer the repairs.
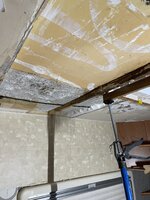
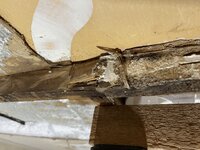
I fixed a crack on the other side last time and never removed all the material on the other side (hindsight is a wonderful thing) as I would have removed more had I have known.
At least the repair on the other side has held up well
So after finding the roof was leaking I have now over engineered the repair. Fingers crossed this will be the last time I repair this Motorhome
New beam from side to side at the rear, wasn’t sturdy enough for my liking so I added a aluminium support bolted through with stainless steel bolts and nylock nuts. Then I added supports either side to be double sure they wouldn’t move.
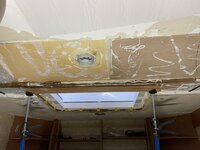
Added gorilla tape on each side of the aluminium to help with condensation.
I have also added an additional beam to support the join of the old and new plywood. Using 25mm rigid insulation instead of polystyrene has made a massive difference.
As I have come this far, am going to rip out the last back bit of the roof to check around the roof light for leaks as I have noticed a damp patch at the other side (can’t be sure if this is a leak?) Plus I have the materials as the insulation is a full sheet
I reckon another week of evenings and next week end to complete
This site uses cookies to help personalise content, tailor your experience and to keep you logged in if you register.
By continuing to use this site, you are consenting to our use of cookies.


 ). Decided to rip down the roof again - what a delight!