2013 Ducato Headlight Bulb Changing

DBK

LIFE MEMBER
Joined
Jan 9, 2013
Posts
18,831
Likes collected
52,544
Location
Plympton, Devon
Funster No
24,219
MH
PVC, Murvi Morocco
Exp
2013
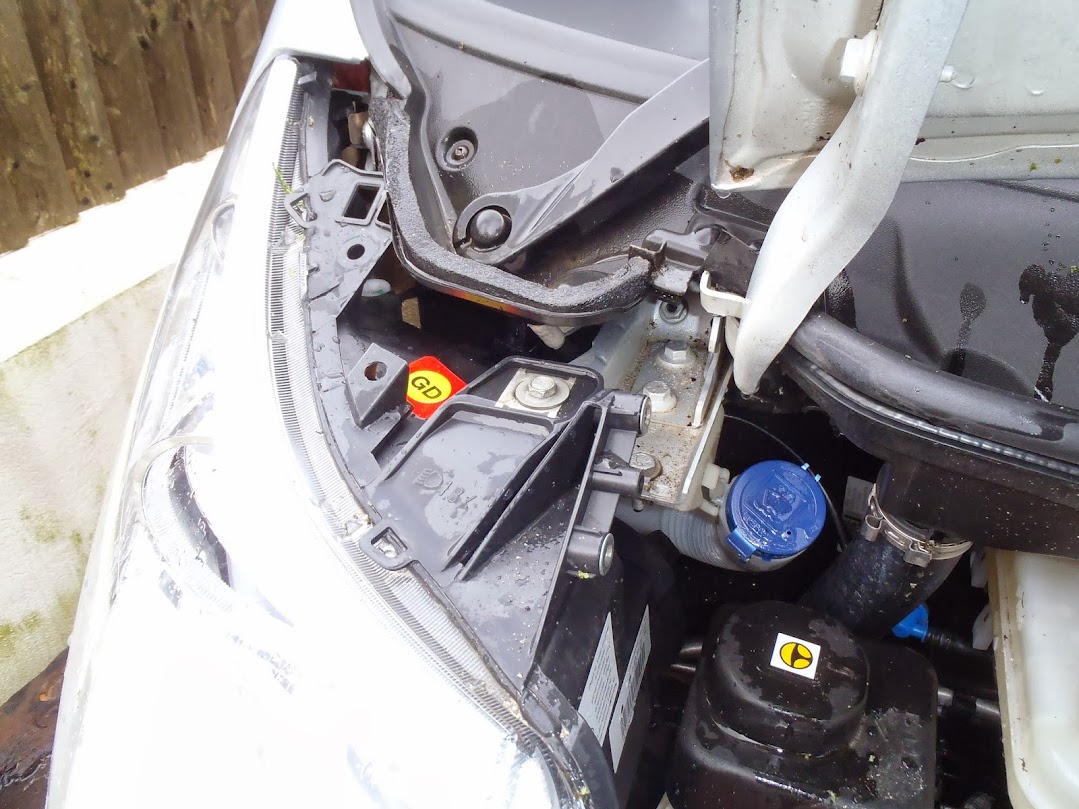
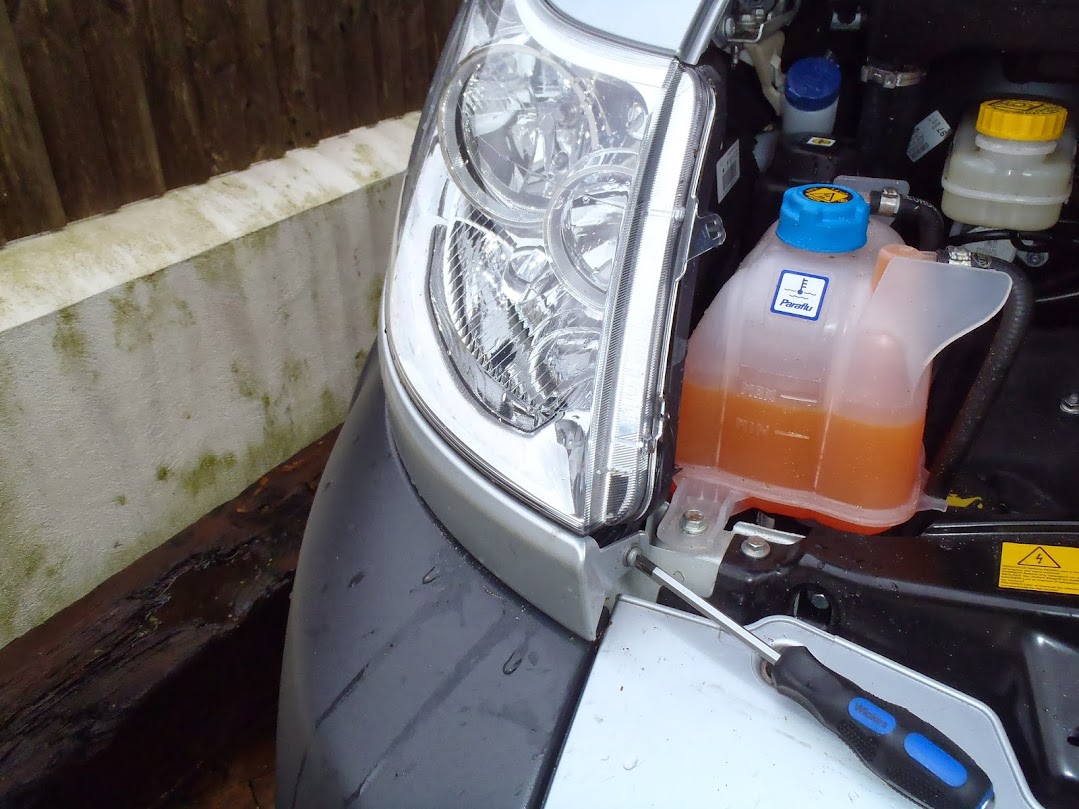
While idling looking under the bonnet of our van this week I wondered how easy it would be to change a headlight bulb. I used to have a car where you had to remove the battery to change one of the bulbs but at first glance the Ducato is in a league of its own.

I bought a workshop manual on CD off E-Bay for £3.00 or thereabouts but when I looked on it all it said about headlight bulbs was a diagram showing you twisted them anti-clockwise! Not a lot of use when you can't even reach them, particularly the one on the right (drivers') side.

Looking on a Fiat forum for 2005 models and earlier you remove the headlights themselves first, after removing a bit of bodywork above the radiator. Does anyone know if this is how you do it on later models? I also had a look on YouTube but no luck there either.

It's a van conversion, 2013.
 
modern headlight bulbs can be a nightmare to change cant they . quite a number of cars need to have the complete front bumper removed before you can even get at the bolts for the headlight unit . makes a mockery of european laws that insist you carry a spare bulb kit for emergency use doesnt it !!
 
If its the same as a 2013 Peugeot Boxer headlamp, then you have to remove the offside headlight, but it is quite easy.
If I remember correctly, with the bonnet up, you will see crosshead screws holding the top plastic cover (2) and the bottom trim (1). Take these out and carefully pop the trim off. Both pieces are held by clips, I used a long wide screwdriver to slide under the trim to release the clips, go carefully, the trim is bendy but must break at some point. Then, you can see the screws/bolts that hold the headlamp in place. Once these are out, the headlamp pops out. Make sure the clip at the back is in place properly when you put it back.

I found out how to do this because my offside headlamp wasn't located at the back properly from new!

Link Removed

Allan
 
Last edited:
Allan, that looks just like mine. I'll have a look tomorrow morning. Many thanks.
John
 
I've removed the top cover, discovering in the process the water drain by the windscreen wiper was blocked. Now unblocked.

P1100032.JPG


I can see the screw to remove but the bottom bit of trim is proving more difficult.

P1100035.JPG


After removing the screw shown the bit of trim is proving reluctant to come off. I got the top one off with a flat screw driver slid along the edge. Does the bottom one come off the same way? I am reluctant to use to much force.

Subscribers  do not see these advertisements

 
You just need to be firm but careful with it. I used a large long bladed screwdriver to free up the first catch. It is quite firm so a bit of levering is required. The second one comes off pretty easily, then the two at the end will need some careful jemmying, but you will have plenty of room by then.
Heres a couple of pictures, you will see what you are up against. Good luck.

Link Removed

and the back view of the trim.

Link Removed

Allan
 
Allan, that's really helpful. I can see now where it is being held and with a long bladed screwdriver I should be able to get them off.

It's a bit like all the skill being in where to hit something not in the actual hitting. In this case the skill is where to pull or "rive" as they call it where I come from.
 
Headlights

Allanm............I note that you have tape on the front of the lamps to deflect when in european and those bits of tape look as though they are enclosed ina marked box, are these marks already on the headlights? I have the same headlights on my Boxer

Thanks Dave
 
Allanm............I note that you have tape on the front of the lamps to deflect when in european and those bits of tape look as though they are enclosed ina marked box, are these marks already on the headlights? I have the same headlights on my Boxer

Thanks Dave

Dave, I can see from the pics that Allanm has the headlamp protectors fitted .... these usually come with the marked area to stick the tape.

You should not stick tape directly on to the plastic headlamps as the heat will cause damage.

Brian
 
Dave, I can see from the pics that Allanm has the headlamp protectors fitted .... these usually come with the marked area to stick the tape.

You should not stick tape directly on to the plastic headlamps as the heat will cause damage.

Brian

Correct, give that man a coconut..... :clap:

I bought them because I thought that I could just leave the tape on the protectors and clip them on when we go abroad and unclip them when we come back.
Its not as simple as that though, you need to take the plastic covers off from below and above the headlight first, as John is doing now. So, I leave them on all the time.

Allan

Subscribers  do not see these advertisements

 
Thanks for that, headlamp protectors it is then

Dave
 
As an aside to this, I'm trying to get some better bulbs for my Ducato as I'm not impressed with the lighting power. What codes are the bulbs? H1 & H7 seems to be what I can find on-line. Is that correct ?

(MH is in storage, so it's not that simple to just have a look and check!)

:thanks:
 
As an aside to this, I'm trying to get some better bulbs for my Ducato as I'm not impressed with the lighting power. What codes are the bulbs? H1 & H7 seems to be what I can find on-line. Is that correct ?

(MH is in storage, so it's not that simple to just have a look and check!)

:thanks:

Sorted I think, they're H4 bulbs the twin filament ones. Lets hope the ones I've ordered are better than the originals
 
Sorted I think, they're H4 bulbs the twin filament ones. Lets hope the ones I've ordered are better than the originals

Not in my van. They are H1 and H7 single filament bulbs.
 
Not in my van. They are H1 and H7 single filament bulbs.

:Doh: Looks like I might have to send mine back then . . . :cry:

Which one is the dipped beam - the H7?

Subscribers  do not see these advertisements

 
I have a spare set in the van for travel abroad, I got them from Halfords. Mine are pretty bright, but I'd be interested in getting some more powerful dipped beam bulbs too, let us know what you eventually get and if there is any improvement.
Allan
 
On my van the dipped bulbs are the outer ones and they have the larger H7 bulbs.

I've seen 100W Xenon bulbs for sale but these take nearly twice the current so this could well cause problems with wiring and switches. I would also be careful taking stronger bulbs outside the UK, your dipped beam is not going to be well controlled and could dazzle. There is an entire website devoted to the problem here in the UK. http://www.blindedbixenon.co.uk
 
Last edited:
I'm sticking with the power output of the original bulbs, but AutoExpress have tested bulbs recently and 'Osram Night Breaker Unlimited' came out on top, so thats what I have. H7's turned up today (which I got for the Saab originally!), so I might get some H1's locally and then send the H4s back when they appear
 
Correct, give that man a coconut..... :clap:

I bought them because I thought that I could just leave the tape on the protectors and clip them on when we go abroad and unclip them when we come back.
Its not as simple as that though, you need to take the plastic covers off from below and above the headlight first, as John is doing now. So, I leave them on all the time.

Allan

We generally take the van abroad for extended trips twice a year, spring and late summer. So we fit the plastic lens covers with the masking tape in the spring and only remove them when we come back to the UK early autumn, just as the nights are drawing in and the MOT is due. :Wink:

Oh, and yes, fitting and removing the protective covers is a bit of a faff, but I manage to do it by only removing the top plastic cover, and remove the screw, but not the whole trim below the headlight. Seems to work for me.

Handy guidance and photos here:

http://deepredmotorhome.com/headlampdeflectors.php

:thumb:

Mike

Subscribers  do not see these advertisements

 
Dont you hate vehicle designers.....If I were starting from scratch I would make things like the ease of changing bulbs part of the design criteria.
Why design things hard.when you could design things easy.

Another great example the diesel fuel filter on the fiat.
A nightmare of bad design and bad material choice...over complex and silly expensive that needs special tools to change and refit !!

I hate some designers and Im one myself !!!

barry
 
A bit off topic, but still relevant. ( it's about headlamps!) Mrs A had a new Beetle a few years ago. One of the headlight bulbs blew and to save taking it back to the dealers ( still under warranty) I thought I would do it myself.
Wrong, according to the dealer, you need a special tool to release the headlamp to get to the bulbs.
Anyway, we took it to them and they changed it.
A while later, we noticed paint and lacquer was lifting from the front wing. It went to the dealers to get repaired and when it came back, the headlamp was misaligned. The dealer said their repair centre didn't remove the lamp to do the repair so it wasn't their fault. They said the headlamp housing was broken and blamed Mrs A saying she must have hit something and we would need to claim on the insurance to get it fixed.
Well, I have never trusted dealers, especially this one, and looked at the lamp myself. After a bit of fiddling about and youtube viewings, I managed to get the headlamp out and discovered overspray behind the light. Also, the mounting bracket was loose and the lamp hadn't been fitted back properly. I lined it up properly and pushed it back in. It clipped into place and fitted perfectly.
So, the moral is, you don't always need special tools, dealers don't tell the truth and youtube is a great recource.
And the dealer? Canterburys main VW dealer, Eurocanterbury.
Allan

I hope you poked them in the eye.as you had proof that the unit was removed. Well done to name and shame.

barry
 
I've now got all the bulbs I need (various internet sellers) and am going to attempt this job tomorrow. I seem to remember seeing a pictorial guide how to get the headlight units out, could anyone point me at it ?
 
If yours has a Ducato base vehicle, just follow the pics and descriptions on the first page of this thread, that should be all you need.
I think you can do the nearside bulb changes without taking the headlight out.

Allan

Subscribers  do not see these advertisements

 
On the subject of maintainability as they call it these days a prize must go to the Centurion Tank - it took 24 hours of solid work to change all the spark plugs, one plug per hour as it had two per cylinder. Then the things weren't the easiest to drive either. The gear lever came up between your legs and to change you had to pause it in neutral and quickly pull on a steering lever before completing the change. If you fluffed a change on a hill and couldn't get it back in gear you lost all steering (steering only worked while it was in gear) so you rolled to the bottom of the hill totally out of control. The brakes being beyond useless. It happened to me but on a sandy track on a range so no damage done. Different thing on a public road.

I also read years ago about an old car (pre-war I think) where the first thing you did before adjusting the tappets was jack the back axle up and remove the rear wheels. So there is nothing new about hard to complete basic servicing tasks. :Smile:
 
Well, it wasn't too difficult in the end, about 30 mins each side (second one was quicker). I've parked it backup in storage again, before it got really dark, but the output did look better than before. Have some photos I just took :

Broken Link Removed

Broken Link Removed

New bulbs have the blue tinge to them, but you don't see that when they are illuminated
Broken Link Removed
 

Join us or log in to post a reply.

To join in you must be a member of MotorhomeFun

Join MotorhomeFun

Join us, it quick and easy!

Log in

Already a member? Log in here.

Latest journal entries

Back
Top