Phil J.
Free Member
Today I fitted a solar panel to our 07 Autotrail Cheyenne 696 and thought the process might be a help to anyone else who wants a similar setup.
This is a very simple as many Autotrails and other motorhomes are fitted with the Sargent EC325 power supply unit and can take a maximum of a 100W panel. Other models of Sargent units can take a panel so it’s worth checking if you have one and you want to fit one. The job is well within the scope of the average DIYer (and believe me I am average). However, the job is a lot easier with an assistant (my pal Trev!).
Parts required (prices include postage):
Ebay:
Biard 100W Solar Panel £89.99
End Mounting Brackets £19.99
Biard MC4 Connectors £3.99
Sikaflex 521 £12.99
Feed Gland £6.95
Sargent:
Solar Connecting Lead for EC325 £12.35
Total £146.26
Tools and other items required:
Drill
Soldering iron
Hole cutter
Cleaner
Corrosion resistant self tapping screws
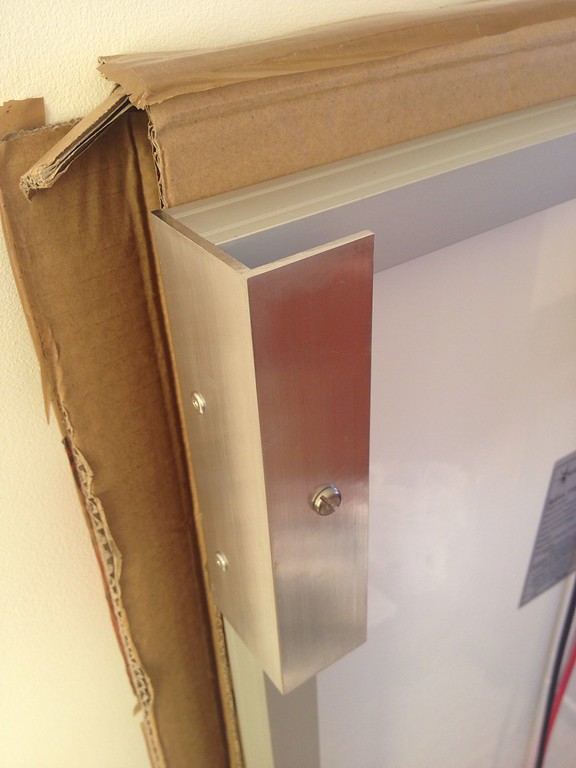
Prior to fitting the panel I fitted the end mounting brackets. This was a simple matter of offering the end bracket up to the panel, drilling one hole and putting one screw in to hold the bracket in position. Then drill the remaining holes and screw in the remaining corrosion resistant self tapping screws. Care should be taken not to drill the actual panel.
The panel came with MC4 connectors fitted to the positive and negative leads so it was just a matter of fitting a pair to the Sargent connecting lead. This is very simple and only a low power soldering iron is required to solder the inner connectors to the leads. Confusingly, the panel had red positive and black negative leads but the connecting lead has brown positive and blue negative – ensure you fit the connectors on the correct leads.
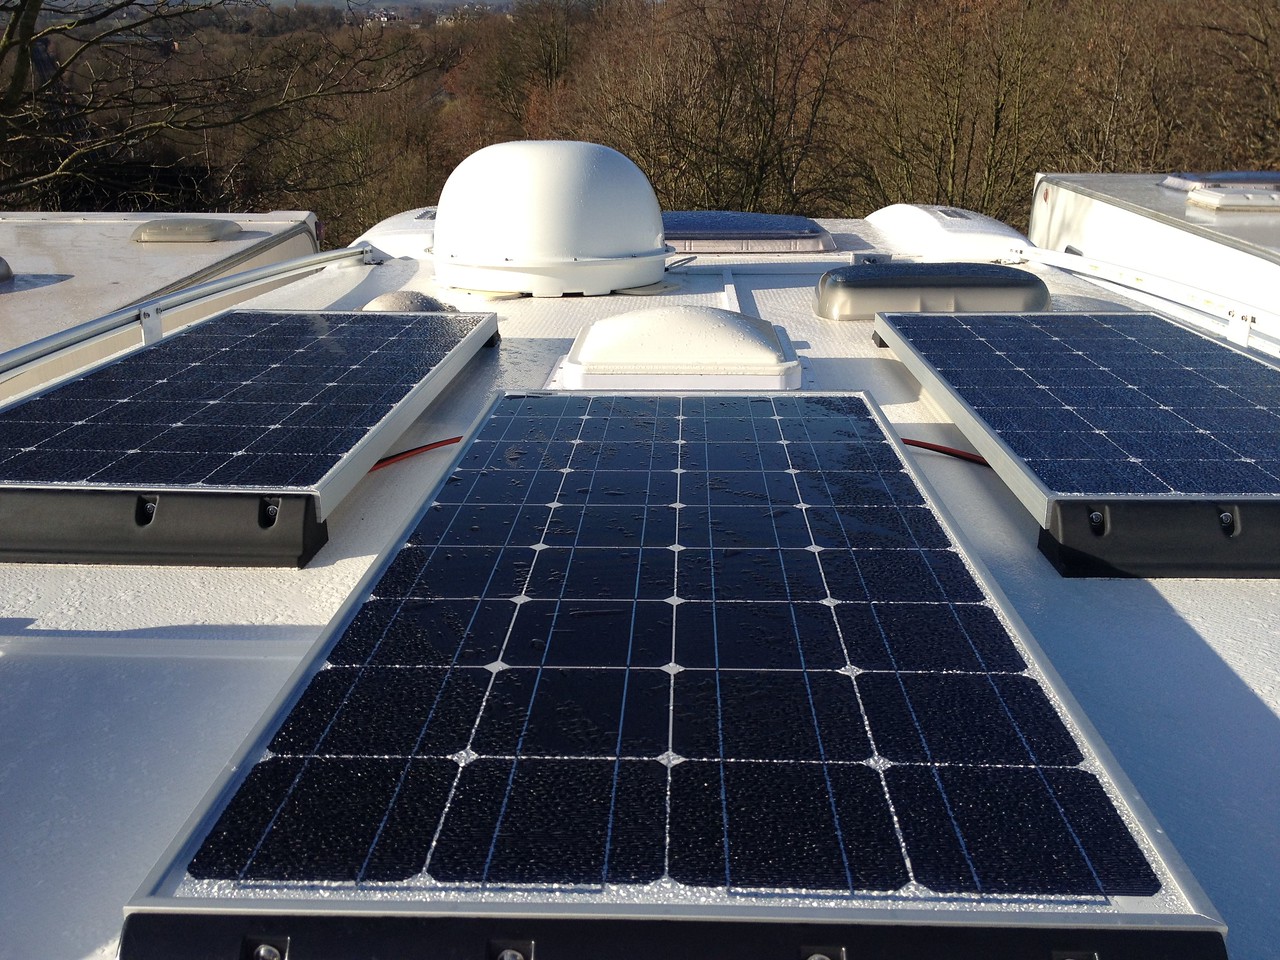
We are now ready for fitting the panel to the motorhome. Lift the panel into the most suitable position and carefully mark out the corner positions of the mounting brackets with a pencil. I ensured that the panel couldn’t be obscured by anything on the roof, e.g. satellite dome or ariel, etc. I also positioned mine so I could reach it through the large roof light in the lounge area for cleaning purposes, apparently one of the biggest causes of reduced solar panel performance is failure to keep them clean. Remove the panel complete with mountings from the roof. Clean the marked roof area thoroughly with Tcut, cutting compound or similar and final clean with mentholated spirits.
Next, the end mountings should be temporarily removed and the mounting undersides given a scuff up with sandpaper (I used 80 grit) to improve adhesion and cleaned with the meths.
Fit the Sargent connecting lead by the MC4 connectors to the panel – its a lot easier done at this stage and you can hide the connectors under the panel.
Apply the Sikaflex to the mounting face of the end mountings and place the mountings on the area you marked on the roof. Clean of the excess Sikaflex and then refit the panel to the mountings with the self tappers.
As I knew there would be too much cable on the Sargent lead I cut the the lead about 30cms (about a foot in old money) from the EC325 plug. This made it easier to thread the lead through the roof.
Now for fitting the gland – carefully position and mark with pencil, clean with Tcut and meths in a position suitable for access to the Sargant power supply unit. Drill the hole using a hole cutter or suitable diameter drill. Scuff up and clean the underside of the gland as per the panel mountings.
Thread the lead from the panel through the gland and Sikaflex the underside – thread the lead through the hole in the roof and place the gland in position. Clean off excess Sikaflex. You can see fromm the pictures I used a duel entry gland. I placed a short length of wire in the unused gland to a. seal the hole and b. give me something to tie to if I want to pull another lead through later.
Now trim of the excess lead and rejoin the Sargent plug using a block connector – careful to connect blue to blue and brown to brown.
Connect the plug into the dedicated socket on the bottom of the EC325. There’s only one and it can only be inserted in the correct position. I had to remove the EC325 from the wall as I tried to fit it with a mirror but there wasn’t enough space. It’s only held on with 4 screws and releasing it from the wall just a centimetre or two gave me enough extra space without removing or stressing the wiring to insert the plug.
Hey presto, job done in a couple of hours! Nearest thing to scary was Trev's tea....and maybe releasing the EC325 from the wall but that was no problem at all in the end - and the best bit even on a dull Derbyshire day the panel is charging.
I hope this helps anyone who is thinking of fitting a panel to a Sargent unit.
Cheers
Phil
 Panel with mountings fitted
 From left to right - MC4 connectors fited, gland with lead threaded through and wire in spare gland, Sargent lead with dedicated EC325 plug.
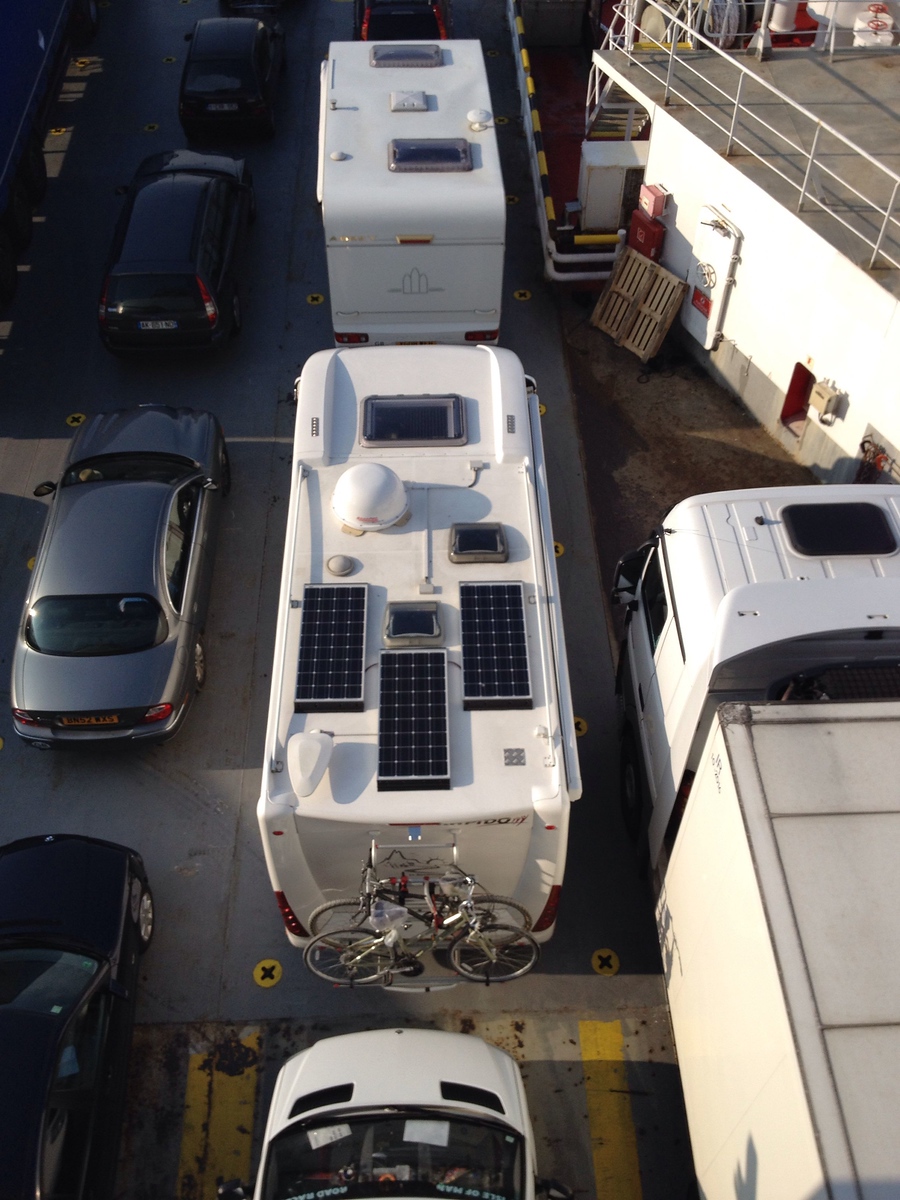
 Location for the panel
 One of the markings out for the mountings.
 Trev doing a bit of cleaning and polishing

In position
 Gland fitted and wires threaded

Sargent plug reconnected ready for plugging in.
 Panel fitted and ready to go
 Gland fitted and sealed.
This is a very simple as many Autotrails and other motorhomes are fitted with the Sargent EC325 power supply unit and can take a maximum of a 100W panel. Other models of Sargent units can take a panel so it’s worth checking if you have one and you want to fit one. The job is well within the scope of the average DIYer (and believe me I am average). However, the job is a lot easier with an assistant (my pal Trev!).
Parts required (prices include postage):
Ebay:
Biard 100W Solar Panel £89.99
End Mounting Brackets £19.99
Biard MC4 Connectors £3.99
Sikaflex 521 £12.99
Feed Gland £6.95
Sargent:
Solar Connecting Lead for EC325 £12.35
Total £146.26
Tools and other items required:
Drill
Soldering iron
Hole cutter
Cleaner
Corrosion resistant self tapping screws
Prior to fitting the panel I fitted the end mounting brackets. This was a simple matter of offering the end bracket up to the panel, drilling one hole and putting one screw in to hold the bracket in position. Then drill the remaining holes and screw in the remaining corrosion resistant self tapping screws. Care should be taken not to drill the actual panel.
The panel came with MC4 connectors fitted to the positive and negative leads so it was just a matter of fitting a pair to the Sargent connecting lead. This is very simple and only a low power soldering iron is required to solder the inner connectors to the leads. Confusingly, the panel had red positive and black negative leads but the connecting lead has brown positive and blue negative – ensure you fit the connectors on the correct leads.
We are now ready for fitting the panel to the motorhome. Lift the panel into the most suitable position and carefully mark out the corner positions of the mounting brackets with a pencil. I ensured that the panel couldn’t be obscured by anything on the roof, e.g. satellite dome or ariel, etc. I also positioned mine so I could reach it through the large roof light in the lounge area for cleaning purposes, apparently one of the biggest causes of reduced solar panel performance is failure to keep them clean. Remove the panel complete with mountings from the roof. Clean the marked roof area thoroughly with Tcut, cutting compound or similar and final clean with mentholated spirits.
Next, the end mountings should be temporarily removed and the mounting undersides given a scuff up with sandpaper (I used 80 grit) to improve adhesion and cleaned with the meths.
Fit the Sargent connecting lead by the MC4 connectors to the panel – its a lot easier done at this stage and you can hide the connectors under the panel.
Apply the Sikaflex to the mounting face of the end mountings and place the mountings on the area you marked on the roof. Clean of the excess Sikaflex and then refit the panel to the mountings with the self tappers.
As I knew there would be too much cable on the Sargent lead I cut the the lead about 30cms (about a foot in old money) from the EC325 plug. This made it easier to thread the lead through the roof.
Now for fitting the gland – carefully position and mark with pencil, clean with Tcut and meths in a position suitable for access to the Sargant power supply unit. Drill the hole using a hole cutter or suitable diameter drill. Scuff up and clean the underside of the gland as per the panel mountings.
Thread the lead from the panel through the gland and Sikaflex the underside – thread the lead through the hole in the roof and place the gland in position. Clean off excess Sikaflex. You can see fromm the pictures I used a duel entry gland. I placed a short length of wire in the unused gland to a. seal the hole and b. give me something to tie to if I want to pull another lead through later.
Now trim of the excess lead and rejoin the Sargent plug using a block connector – careful to connect blue to blue and brown to brown.
Connect the plug into the dedicated socket on the bottom of the EC325. There’s only one and it can only be inserted in the correct position. I had to remove the EC325 from the wall as I tried to fit it with a mirror but there wasn’t enough space. It’s only held on with 4 screws and releasing it from the wall just a centimetre or two gave me enough extra space without removing or stressing the wiring to insert the plug.
Hey presto, job done in a couple of hours! Nearest thing to scary was Trev's tea....and maybe releasing the EC325 from the wall but that was no problem at all in the end - and the best bit even on a dull Derbyshire day the panel is charging.
I hope this helps anyone who is thinking of fitting a panel to a Sargent unit.
Cheers
Phil
In position
Sargent plug reconnected ready for plugging in.