
OP
OP
Hi MarkI don't want to hijack your thread but thought this may be useful for anyone attempting the same thing, or trying to identify their problem.
My van has a slightly different lower construction to yours, I put this diagram together to show the make up. After looking at my issues, it is clear than the mastic seal has failed, this allows water to pass through down the side of the van. is collects on the bottom edge. This perpetually happening causes the damage, it also allows the water to eventually soak up into the floor timbers. Again a slightly different issue to yours but the result could potentially be the same.
This is a good thread that people with similar issues will find it through the search.
View attachment 404660
After pulling my MH apart the construction of yours and mine are very similar, I thought that I had metal across the full floor however these are only small strips. The drawing I posted earlier in the thread shows a second piece of ply in the wall structure and again this is incorrect. My wall construction is the same as you diagram shows.
Thanks for the lovely diagram, much better than my sketch

 .
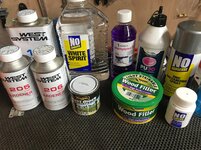
. . I first see this product on a YouTube video and was amazed at its durability. It is expensive but even submerged untreated in water it remains dimensionality exactly as it is produced.
 ....I worry I will.never find the dry wood.


 .
. ...I know my issues are not anywhere near what you have dealt with, so I will certainly take my hat off to you.
 )
)

 )
) now from somewhere else. You really couldn't make this up!