funflair
LIFE MEMBER
Not everybody knows this, BUT some motorhomes have double glazed glass panels in the cab side windows and in some cases all of the habitation windows.
After we bought our Niesmann+Bischoff Flair at 6 years old I realised that one of the side windows was steaming up in the summer sun (OK in the winter) 3 years later I eventually plucked up the courage to do something about the problem, I could have gone to the factory in Germany and paid well over £1000 for them to fix it or to the UK dealer and paid even more BUT as a Yorkshire man I was not up for that so would have a go myself.
A friend in our owners club had done his without any drama so time to tackle ours, his is a newer Arto ours a 2006 Flair but the same idea "I thought".
If you want the shortened version of events, it was not as easy as it should have been and the window went BANG, at the moment I have a perspex one in and am getting two new units made to be fitted later, I will add that the new ones are only £96 each so still well in pocket. If all had gone to plan the glass panel would have been separated, dried out and then stuck back together.
The techy bits are described below along with pictures.
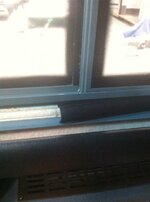
Pull out the rubber trim from the inside to expose all the fixing screws.
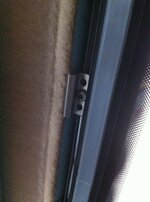
Remove all the fixing screws.
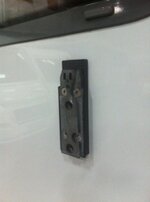
Remove the mirror with a sharp bump with the heel of your hand.
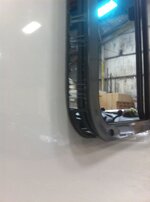
Gently ease the frame away from the body ( the mastic should be non setting so quite easy)
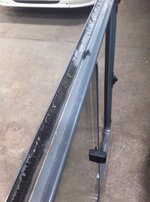
This is showing where the sealing tape had not been properley fitted to the top of the window at the factory.
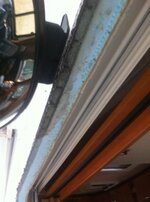
You can see the water marks on the foam but no damage done in 9 years because the construction is aluminium inside and out.
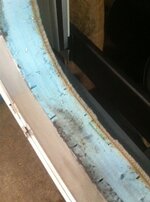
Drainage channels in the foam before the alloy skins are put on allow any leaks to run away and out the bottom of the panels, no wood anywhere in the wall construction.
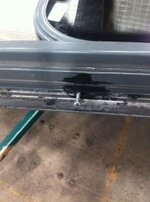
Remove the crews for the vertical glazing bar for the front window panel.
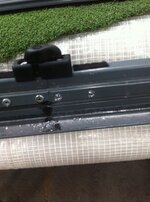
Drill out all the pop rivets for connecting the two frame halves and fixing the window catch.
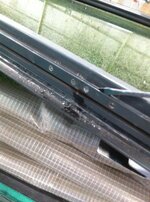
Slide along the steel spreader plate to allow the frame to seperate, there will still be a small roll pin in to locate the sections together but this will knock along as well if you can find it, or the frame will come apart with it in place.
OK this is photos so far, I have split the window frame and the sliding window comes out easy, the front fixed panel will come out easy unless it is all stuck in, our was all stuck in and eventually the glass went BANG and the sealant had to be cut out with a blade. I have replaced the glass with perspex and reassembled the frame and it is all fitted back in. I will be getting two new double glazed units made and replacing both sides.
I will update with reassembly photos as and when I do the job but it is just a reversal of taking it all apart.
I dont think this is a job for somebody lacking confidence or DIY skills as for example the easiest way to get the glass out if it is all stuck in would be to put a hammer through it, no turning back after that though.
Martin
After we bought our Niesmann+Bischoff Flair at 6 years old I realised that one of the side windows was steaming up in the summer sun (OK in the winter) 3 years later I eventually plucked up the courage to do something about the problem, I could have gone to the factory in Germany and paid well over £1000 for them to fix it or to the UK dealer and paid even more BUT as a Yorkshire man I was not up for that so would have a go myself.
A friend in our owners club had done his without any drama so time to tackle ours, his is a newer Arto ours a 2006 Flair but the same idea "I thought".
If you want the shortened version of events, it was not as easy as it should have been and the window went BANG, at the moment I have a perspex one in and am getting two new units made to be fitted later, I will add that the new ones are only £96 each so still well in pocket. If all had gone to plan the glass panel would have been separated, dried out and then stuck back together.
The techy bits are described below along with pictures.

Pull out the rubber trim from the inside to expose all the fixing screws.

Remove all the fixing screws.

Remove the mirror with a sharp bump with the heel of your hand.

Gently ease the frame away from the body ( the mastic should be non setting so quite easy)

This is showing where the sealing tape had not been properley fitted to the top of the window at the factory.

You can see the water marks on the foam but no damage done in 9 years because the construction is aluminium inside and out.

Drainage channels in the foam before the alloy skins are put on allow any leaks to run away and out the bottom of the panels, no wood anywhere in the wall construction.

Remove the crews for the vertical glazing bar for the front window panel.

Drill out all the pop rivets for connecting the two frame halves and fixing the window catch.

Slide along the steel spreader plate to allow the frame to seperate, there will still be a small roll pin in to locate the sections together but this will knock along as well if you can find it, or the frame will come apart with it in place.
OK this is photos so far, I have split the window frame and the sliding window comes out easy, the front fixed panel will come out easy unless it is all stuck in, our was all stuck in and eventually the glass went BANG and the sealant had to be cut out with a blade. I have replaced the glass with perspex and reassembled the frame and it is all fitted back in. I will be getting two new double glazed units made and replacing both sides.
I will update with reassembly photos as and when I do the job but it is just a reversal of taking it all apart.
I dont think this is a job for somebody lacking confidence or DIY skills as for example the easiest way to get the glass out if it is all stuck in would be to put a hammer through it, no turning back after that though.
Martin
