Rapidoman 2011
LIFE MEMBER
I have already explained how l wrapped the cupboard doors using 3M-94 but when it come to Perspex its a whole new ball game. So as before l will do an image by image account of how l do it. First of all, we do not use our drinks cabinet, l prefer to drink from glasses made of glass so we store them in a box in the double floor, instead l replaced the plastic glass holder with a wooden shelf, and that is a lot more useful for us. So here goes.
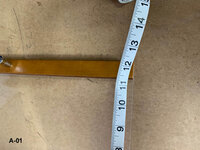
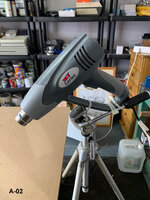
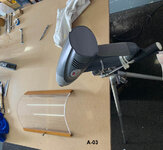
1, Remove cabinet door, clean well and all edges. Lay down and measure, allow some extra all round. Pic A-1. Next l set up a heat gun on a tripod ready Pics A-2 and A-3.
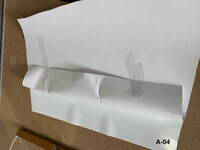
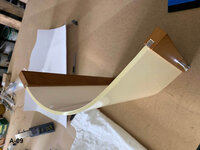
Next fold back the backing, about 4 inches and because the Perspex is what l call a grabber, stick it back with tape. Pic A-4. Now as before with the cupboard doors, line the edge up and wipe out bit by bit with the wipe tool. If you find this a little hard, switch on the heat gun and pull back and redo. This is why l go for the thicker wrap, you can work it Pic A-5.
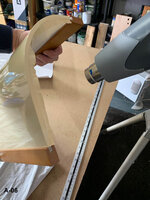
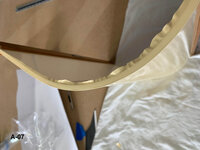
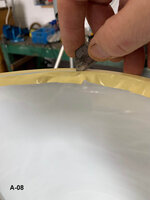
Now the edges, what people worry about, but don't. Get the heat on low and holding the door just rock it side to side under the heat, you will see the wrap tighten up abit, at this point just pull it over tightly with your fingers, careful don't burn them. Pics- A-06. Do not worry about the surplus at this point, let it cool aliitle and simply cut off with sharp blade Pic A-07 and A-08
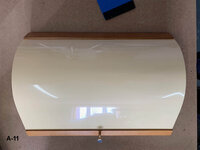
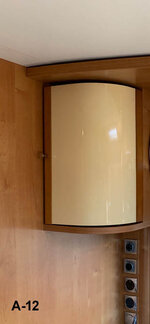
In Pic A09 shows the finished edge and Pic A10 shows the finished Door. Pic A-11 door back in place.
Hope you enjoyed
regards
Tony
1, Remove cabinet door, clean well and all edges. Lay down and measure, allow some extra all round. Pic A-1. Next l set up a heat gun on a tripod ready Pics A-2 and A-3.
Next fold back the backing, about 4 inches and because the Perspex is what l call a grabber, stick it back with tape. Pic A-4. Now as before with the cupboard doors, line the edge up and wipe out bit by bit with the wipe tool. If you find this a little hard, switch on the heat gun and pull back and redo. This is why l go for the thicker wrap, you can work it Pic A-5.
Now the edges, what people worry about, but don't. Get the heat on low and holding the door just rock it side to side under the heat, you will see the wrap tighten up abit, at this point just pull it over tightly with your fingers, careful don't burn them. Pics- A-06. Do not worry about the surplus at this point, let it cool aliitle and simply cut off with sharp blade Pic A-07 and A-08
In Pic A09 shows the finished edge and Pic A10 shows the finished Door. Pic A-11 door back in place.
Hope you enjoyed
regards
Tony
Attachments
-
 A-1.jpg108.7 KB · Views: 185
 -
 A-2.jpg120.7 KB · Views: 178
 -
 A-3.jpg119.6 KB · Views: 168
 -
 A-4.jpg56.2 KB · Views: 166
 -
 A-5.jpg85 KB · Views: 172
 -
 A-6.jpg111.2 KB · Views: 170
 -
 A-7.jpg62.8 KB · Views: 168
 -
 A-8.jpg55.4 KB · Views: 167
 -
 A-9.jpg72.4 KB · Views: 172
 -
 A-10.jpg55.5 KB · Views: 182
 -
 A-11.jpg34.5 KB · Views: 183


