Fitting solar (1 Viewer)

Jul 26, 2019
441
498
Devon / Cornish border
Funster No
62,726
MH
Mobilvetta Kimu 122
Exp
2019
Had a quick search on the forums and feel I am more than capable of fitting the panel, the only worry I have is drilling a hole in the roof.

Any tips from those that have done it?
 

Lenny HB

LIFE MEMBER
Oct 18, 2007
53,404
149,856
On the coast in West Sussex
Funster No
658
MH
Hymer B678 DL
Exp
Since 2008 & many years tugging
Measure twice and again before drilling. Drill a small pilot hole from inside first. If you have a micro fibre roof lining put masking tape on it and drill very carefully.
 
OP
OP
Rjcamper
Jul 26, 2019
441
498
Devon / Cornish border
Funster No
62,726
MH
Mobilvetta Kimu 122
Exp
2019
Sealing tips? Thinking I would seal around cable through hole as well as around cover on roof?

Subscribers  do not see these advertisements


Two on Tour

LIFE MEMBER
Sep 16, 2016
10,316
50,866
Near the junction of the A14 and A1, Cambs
Funster No
45,145
MH
Elddis Autoquest 175
Exp
Since 2010
Take your time and measure the position you plan to come through and the cable route you plan to take once your through.
Be sure that there are no lighting or power cables in the ceiling at the point you plan to drill though as it would be a nightmare to repair them if you damage any.
When you are happy with the position you are going to come through at, then drill though with a small pilot drill say 3mm to confirm it is the correct place both on the roof and in your van before using a drill big enough to take the cables.
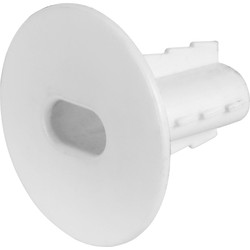
Make sure the cable entry glands on the van roof are not in the direction of travel and you can neaten up the cable entry in the van if it is likely to be see with these.

 
Dec 2, 2019
4,058
9,075
South Lincolnshire
Funster No
67,140
MH
Rapido 7065+
Exp
Broken most bits now
My roof is an aluminium sandwich affair about 50mm thick. I just ran a ring of Sika 252 around each hole in the plastic support pads I was using aswell as loads of the Sika to stick the things down. I then used 25mm self drilling M5 bolts with integral sealing washer straight into the roof without any pilot holes. Both panels survived the recent storms with no leaks...

Subscribers  do not see these advertisements

 
OP
OP
Rjcamper
Jul 26, 2019
441
498
Devon / Cornish border
Funster No
62,726
MH
Mobilvetta Kimu 122
Exp
2019
Thats a bit extrem, best just to use Sika the less holes in the roof the better.
That was my plan, one hole for the cable to rest will be stuck down with a bit of Amattabooboo

Subscribers  do not see these advertisements

 
Last edited:
Dec 2, 2019
4,058
9,075
South Lincolnshire
Funster No
67,140
MH
Rapido 7065+
Exp
Broken most bits now
Thats a bit extrem, best just to use Sika the less holes in the roof the better.
From years trying to bond things in construction I can't trust any adhesives in a real world situations so prefer the peace of mind of the mechanical fixings as a backup. Sika 252 also takes a while to achieve full strength so didn't fancy parking the moho up for a few weeks whilst the glue set. The Sika will get better and better with time but the screws will hold it all in place in the short term and then act as the backup
 

Lenny HB

LIFE MEMBER
Oct 18, 2007
53,404
149,856
On the coast in West Sussex
Funster No
658
MH
Hymer B678 DL
Exp
Since 2008 & many years tugging
From years trying to bond things in construction I can't trust any adhesives in a real world situations so prefer the peace of mind of the mechanical fixings as a backup. Sika 252 also takes a while to achieve full strength so didn't fancy parking the moho up for a few weeks whilst the glue set. The Sika will get better and better with time but the screws will hold it all in place in the short term and then act as the backup
My satellite dish is still up there been on nearly 3 years only held with Sika 292i.
 
Dec 2, 2019
4,058
9,075
South Lincolnshire
Funster No
67,140
MH
Rapido 7065+
Exp
Broken most bits now
My satellite dish is still up there been on nearly 3 years only held with Sika 292i.
Must be good paint on there then as that's what your dish is really stuck to. That said, after the recent storms I wouldn't want my dish up even with M32 bolts holding it down - it would just rip the roof off.

Subscribers  do not see these advertisements


Two on Tour

LIFE MEMBER
Sep 16, 2016
10,316
50,866
Near the junction of the A14 and A1, Cambs
Funster No
45,145
MH
Elddis Autoquest 175
Exp
Since 2010
Must be good paint on there then as that's what your dish is really stuck to. That said, after the recent storms I wouldn't want my dish up even with M32 bolts holding it down - it would just rip the roof off.

The outer aluminium skin on our van has an electro bonded colour coating as I expect most modern motorhome are and not spray painted
 
Jan 19, 2014
9,383
24,751
Derbyshire
Funster No
29,757
MH
Elddis Accordo 105
Exp
since 2014
Our thin aluminium roof skin isn't stuck to the ply underneath because it buckles up when hot, so I used 8 course thread screws and sikaflex 512 on the panel.
I drilled the cable hole a bit bigger than the cable so I could get sealant down with it (I used to do that with coldroom wiring ?)
 

Captain Pants

Free Member
Dec 19, 2019
451
2,640
Cornwall
Funster No
67,480
MH
Weinsberg PVC
Exp
Since 1982
I always use high quality mechanical marine fittings for jobs like that. Obtain from somewhere like Force 4 Chandlery.

Subscribers  do not see these advertisements

 
Dec 2, 2019
4,058
9,075
South Lincolnshire
Funster No
67,140
MH
Rapido 7065+
Exp
Broken most bits now
The outer aluminium skin on our van has an electro bonded colour coating as I expect most modern motorhome are and not spray painted
It's still a bonded protective coating, the same as spray applied paint, so without doing pull-off tests it's impossible to say how well bonded it is. Electro bonding just allows thinner coating due to more consistent thickness on all surfaces, unlike spray application which thins at edges.
 

Two on Tour

LIFE MEMBER
Sep 16, 2016
10,316
50,866
Near the junction of the A14 and A1, Cambs
Funster No
45,145
MH
Elddis Autoquest 175
Exp
Since 2010
It's still a bonded protective coating, the same as spray applied paint, so without doing pull-off tests it's impossible to say how well bonded it is. Electro bonding just allows thinner coating due to more consistent thickness on all surfaces, unlike spray application which thins at edges.

I was building historic racing cars for many years when I had my classic car business and the body panels that I bought from British Heritage came to us with a electro coated primer on them which was a bloody nightmare to remove on the areas that require welding and had to be removed with an angle grinder and abrasive flap wheel pad , so I can say that having had experience of this process that it has a far far greater adhesion to the substrate than any spray painted substrate that I have dealt with.

Subscribers  do not see these advertisements


Lenny HB

LIFE MEMBER
Oct 18, 2007
53,404
149,856
On the coast in West Sussex
Funster No
658
MH
Hymer B678 DL
Exp
Since 2008 & many years tugging
Must be good paint on there then as that's what your dish is really stuck to. That said, after the recent storms I wouldn't want my dish up even with M32 bolts holding it down - it would just rip the roof off.
My van has 2mm grp capping on top of the alloy roof.
 

Mark and Mindy

LIFE MEMBER
Oct 18, 2017
1,029
4,796
Nr Bicester
Funster No
51,006
MH
Adria Twin 640 SGX
Exp
Since 2019
Our van is a panel van conversion PVC. The roof is ridged single skin thin steel. I had to drill a 25mm hole for the MiFi external LTE aerial.

I did drill a pilot hole but a large regular drill would bind when drilling such thin sheet metal so I got a ARMEG SHORT SERIES LDX TCT HOLESAW 25MM cutter from Screwfix.

I also got WD-40 CUTTING OIL 400ML and I really think it made a difference to keep the work cool during the cutting. I cut up some rigid polythene food packaging and stuck it down to the roof with masking tape to make a dam which collected the oil and the swarf debris.

After cutting the hole I made sure to remove all the swarf debris from the roof which could have rusted and made unsightly markings.

I kept the hole as a souvenir.


Mark
 
Jan 11, 2018
1,164
1,348
Malvern Link, Malvern, UK
Funster No
51,943
MH
Chausson Welcome 85
Exp
Since 2018
Just finished my installation (see nearby thread) the one hole I needed to make was the one to pass both 6mm sq cables through.
I used a 16mm wood drill.

No problem at all , on my roof it when through 3mm of plastic into a polystyrene core, then through what looks like 5mm ply and into one of the lockers.

What surprised me was how insubstantial the polystyrene was , not closed cell etc.

I'm amazed , given the roof construction that I can walk (carefully) on the roof.

My experience tends to support the view that if you use screws for the panel you are really not screwing into anything very substantial and a weak joint can result. Far better, arguably to glue it with a really good adhesive, thus spreading loads over much bigger areas and reducing stresses in the joints.

Subscribers  do not see these advertisements

 
Jan 11, 2018
1,164
1,348
Malvern Link, Malvern, UK
Funster No
51,943
MH
Chausson Welcome 85
Exp
Since 2018
Had a quick search on the forums and feel I am more than capable of fitting the panel, the only worry I have is drilling a hole in the roof.

Any tips from those that have done it?
From my recent experience the difficulty I had was how to place the panel into place once the feet of the brackets had been covered liberally in adhesive.
I got the panel (200w 1.3m x 1m and 14Kg) up onto the roof , dry. Then applied the adhesive with it upside down, then tipped it perpendicular to the roof , then walked around it and carefully placed it down on my marks.
 

Lenny HB

LIFE MEMBER
Oct 18, 2007
53,404
149,856
On the coast in West Sussex
Funster No
658
MH
Hymer B678 DL
Exp
Since 2008 & many years tugging
From my recent experience the difficulty I had was how to place the panel into place once the feet of the brackets had been covered liberally in adhesive.
I got the panel (200w 1.3m x 1m and 14Kg) up onto the roof , dry. Then applied the adhesive with it upside down, then tipped it perpendicular to the roof , then walked around it and carefully placed it down on my marks.
I laid the panel with brackets on the roof, drew around the backets moved the panel out of the way. Applied masking tape around the pencil marks then applied Sika to the roof. Then got a friend or the boss to help me place the panel in position.
 
Jan 11, 2018
1,164
1,348
Malvern Link, Malvern, UK
Funster No
51,943
MH
Chausson Welcome 85
Exp
Since 2018
I laid the panel with brackets on the roof, drew around the backets moved the panel out of the way. Applied masking tape around the pencil marks then applied Sika to the roof. Then got a friend or the boss to help me place the panel in position.

That was exactly my plan B, Lenny(y)

Subscribers  do not see these advertisements

 
OP
OP
Rjcamper
Jul 26, 2019
441
498
Devon / Cornish border
Funster No
62,726
MH
Mobilvetta Kimu 122
Exp
2019
Thanks all for your help. I have now picked up the new MoHo (2006 New to me ;-)), leisure battery is under the passenger seat, as part of the solar panel installation I plan to move the batteries under the rear bed (with external access). I have searched and searched, but cant see to see if someone has done a 'How to...'

Again any advice appreciated
 
Jan 11, 2018
1,164
1,348
Malvern Link, Malvern, UK
Funster No
51,943
MH
Chausson Welcome 85
Exp
Since 2018
Thanks all for your help. I have now picked up the new MoHo (2006 New to me ;-)), leisure battery is under the passenger seat, as part of the solar panel installation I plan to move the batteries under the rear bed (with external access). I have searched and searched, but cant see to see if someone has done a 'How to...'

Again any advice appreciated
Don’t know which MH you have bought but I would ask you to have a think about where you can connect the feed from the controller to access the leisure battery.
On mine , which has CBE electrical I was able to wire to the 12v distribution board under the foot of the bed and pick up the vehicle battery under the passengers seat, 3 meters or so away.


In fact I used a dual battery controller to pick up the feed to the leisure battery as well from the same distribution board.

If you have the wiring diagram for your MH study it carefully and ask some questions here to formulate your plan.

 
OP
OP
Rjcamper
Jul 26, 2019
441
498
Devon / Cornish border
Funster No
62,726
MH
Mobilvetta Kimu 122
Exp
2019
Mobilvetta, wiring diagram in the pack of manuals I have is really basic, I could have drawn it without even seeing the van ?? so not much help.

Only just got the van so will do some digging

Subscribers  do not see these advertisements

 
OP
OP
Rjcamper
Jul 26, 2019
441
498
Devon / Cornish border
Funster No
62,726
MH
Mobilvetta Kimu 122
Exp
2019
OK, next question, had a look at a couple of the sites mentioned in other threads, ie sun store. eBay has similar kits at half the price!! Anyone bought these and is it worth a gamble as will save over £100?
 

Join us or log in to post a reply.

To join in you must be a member of MotorhomeFun

Join MotorhomeFun

Join us, it quick and easy!

Log in

Already a member? Log in here.

Latest journal entries

Funsters who are viewing this thread

Back
Top