
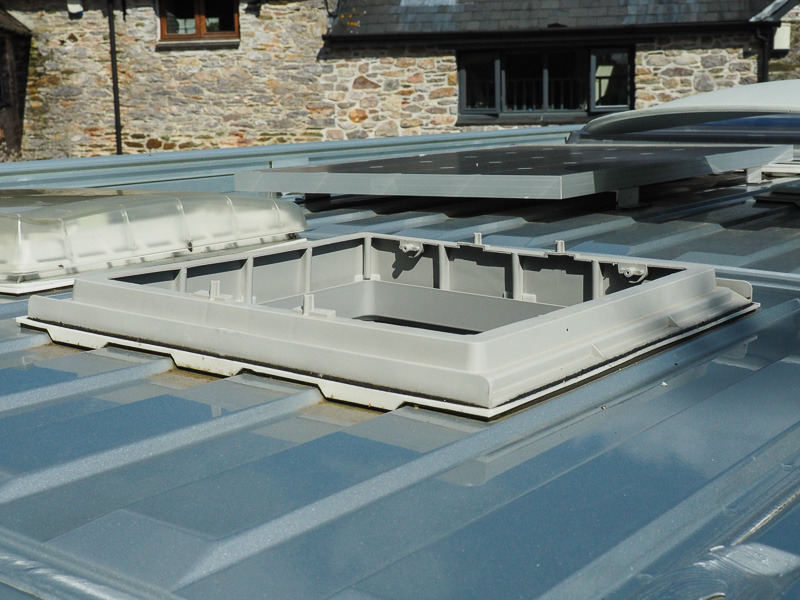
Out toilet compartment has a rooflight which even over just a couple of years has become pretty dirty. It's not anything we do in there, honest, the problem is it is double glazed but by the most useless double glazing company because there is a gap all round the edge into which dust is blown and settles between the two bits of clear plastic. The problem is compounded because it is not possible to clean between the two bits without several tools and a pair of high step ladders or a ladder.
Assuming you have these tools here is how to take it apart for cleaning.
Note: These are the tools which worked on ours - yours may be different and the whole design might be different too. Our window has an opening of 400 by 400 and the top is smooth. Some are quite angular and the method described may not work on yours!
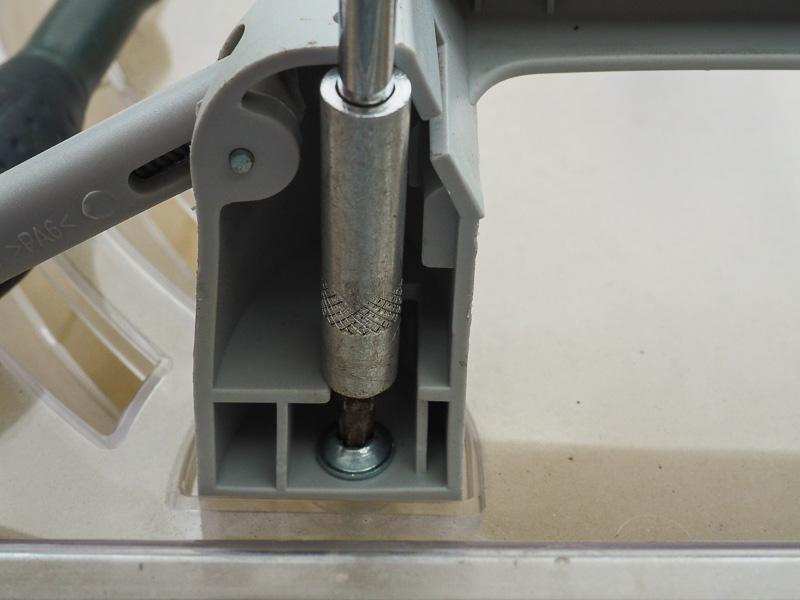
With a T10 Torx screwdriver remove the 4 self-tapping screws on which the roof mechanism pivots.
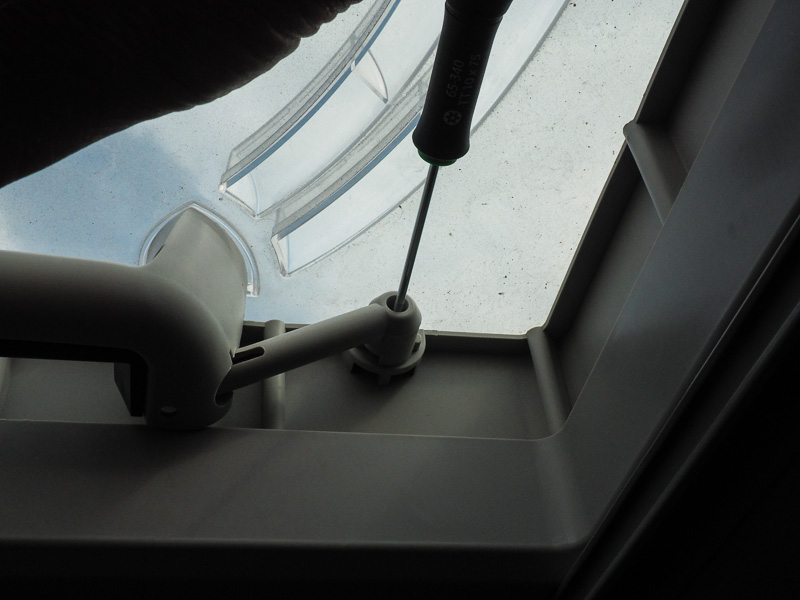
When you have removed them all, the arms can be lifted off and swung out of the way.
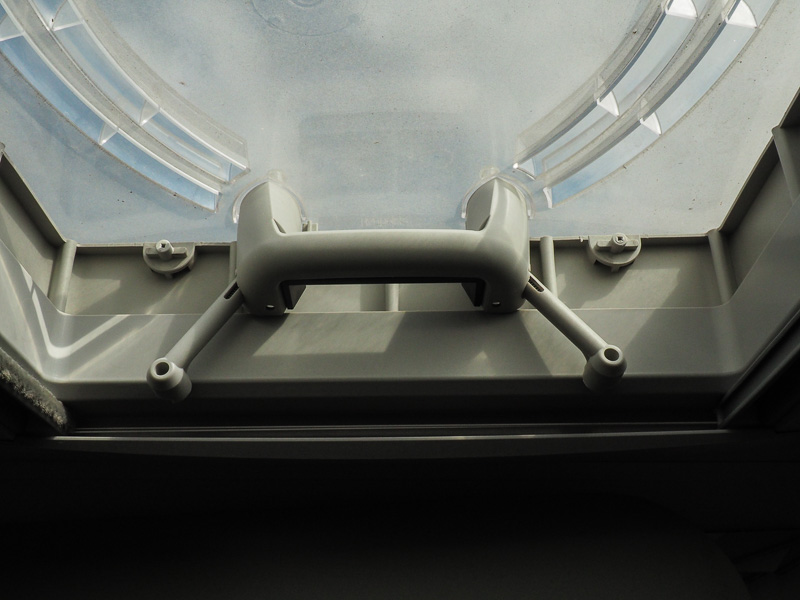
In a perfect world the rooflight could be retracted through the opening - it can't! So push it up and ensure it is free of the opening.
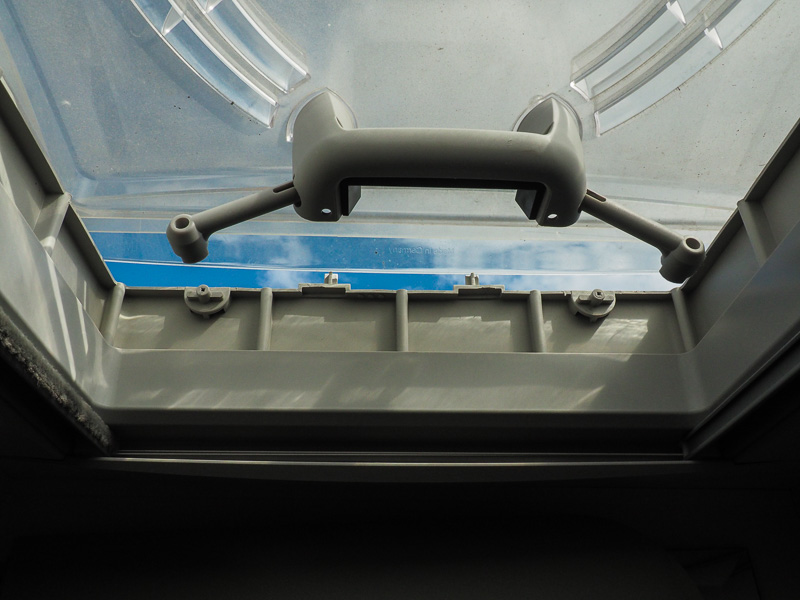
Now dig out those tall steps or a ladder, or if you have very good balance a tall pair of stilts, and get up there.
Without falling off your elevating tool of choice, grab the rooflight.
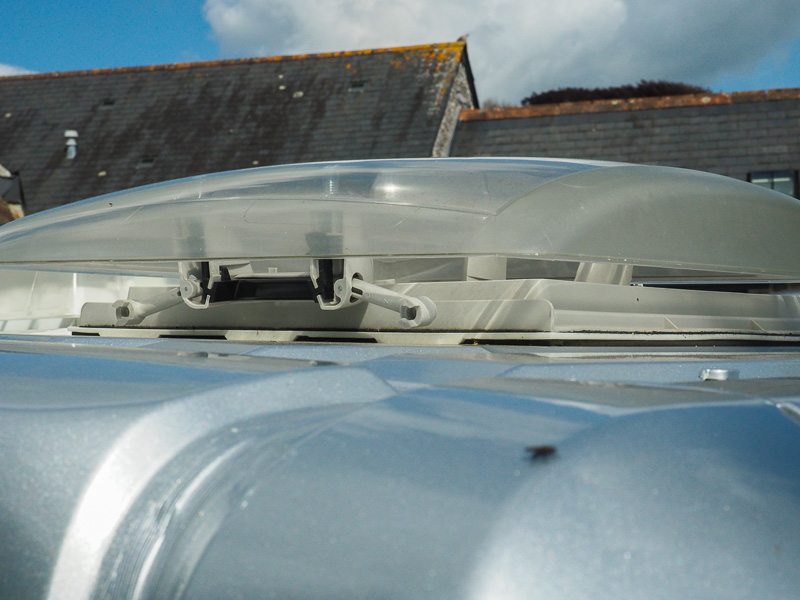
Note hard to reach dirt around the edge of the rooflight. Discuss with wife at this point who is going to clean it. After discussion go and get sponge and bucket and clean roof.
Afterwards, retire to somewhere you can put the rooflight down upside down without scratching it.
Now the slightly tricky bit. You need a T25 Torx screwdriver. Do not be tempted to bodge it with the wrong tool, the screws can be in very tight and I have heard of folk giving up at this point.
I only had a cheap socket set but with a bit of effort they could be loosened. A bit of sandpaper or the like scrunched up and put in the socket so the T25 bit protrudes more than normal helps it grip the screw better as you can put some downward force on it.
"Hold on" I hear you say, "mine doesn't look like that, there is a black plastic bit in the way." And indeed there is. This bit.
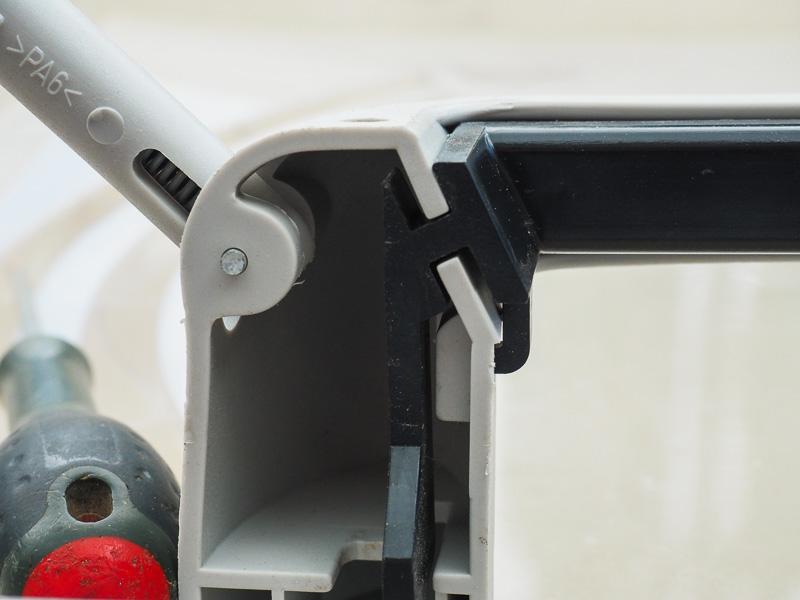
Not a great photo as you can't see the bottom of it but if you could you would see the socket I was using wouldn't fit because the black plastic bit was in the way. If you have a proper T25 Torx screwdriver, as I had for the T10 size, you probably don't need to do the next bit but if you don't have the proper tools this is the trick.
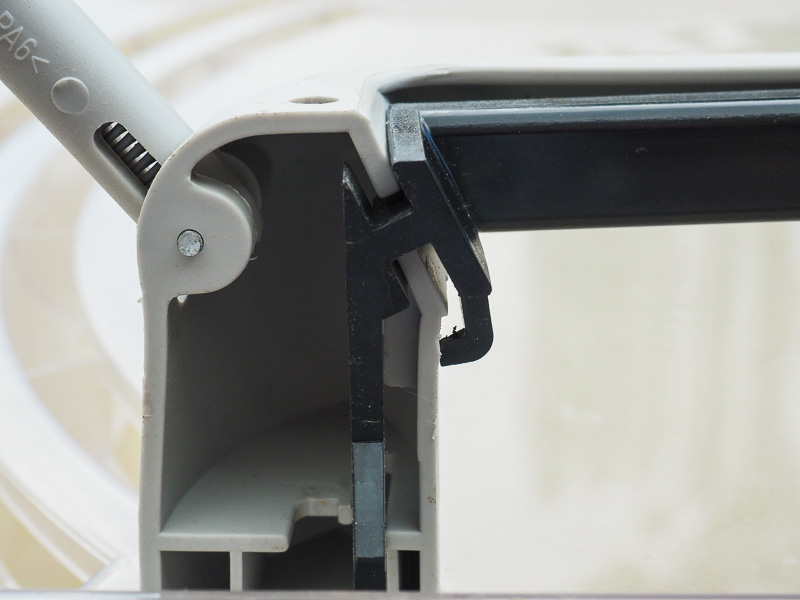
With a small screw driver lever up the little bit of plastic on the right and pull the black plastic bit towards you at the same time. (Compare the two photographs above to see the difference - but no prizes for spotting it, this isn't a competition) Do the same on the other side and then pull the whole bit away - it has two springs on the back but they were captive. They may not be on yours so don't blame me if they go "ping" and disappear down a mouse hole. Just take things carefully and doing it when the plastic is warm so there is less chance of breakage due to it being brittle would be sensible.
And that is it. When all four T25 screws have been removed the two parts of the rooflight will come apart and you can then take them and give them a good wash in the bath - they were too big for the kitchen sink.
When reassembling, and mindful the T25 screws can get seized I thoroughly dried the inside of the little pillars with a hair-drier. This will hopefully ensure the screws do not corrode and expand. In hindsight I think you would be wise to replace the T25 screws before washing the upper bit to reduce the amount of water getting in.
Reassembly was, as they say is a reverse of disassembly, the only small trick was when replacing the arms on the T10 pillars pull the handle down just a fraction so the arms rotate enough to slip on past the stop which is moulded onto the pillar.
Assuming you have these tools here is how to take it apart for cleaning.
Note: These are the tools which worked on ours - yours may be different and the whole design might be different too. Our window has an opening of 400 by 400 and the top is smooth. Some are quite angular and the method described may not work on yours!
With a T10 Torx screwdriver remove the 4 self-tapping screws on which the roof mechanism pivots.
When you have removed them all, the arms can be lifted off and swung out of the way.
In a perfect world the rooflight could be retracted through the opening - it can't! So push it up and ensure it is free of the opening.
Now dig out those tall steps or a ladder, or if you have very good balance a tall pair of stilts, and get up there.
Without falling off your elevating tool of choice, grab the rooflight.
Note hard to reach dirt around the edge of the rooflight. Discuss with wife at this point who is going to clean it. After discussion go and get sponge and bucket and clean roof.
Afterwards, retire to somewhere you can put the rooflight down upside down without scratching it.
Now the slightly tricky bit. You need a T25 Torx screwdriver. Do not be tempted to bodge it with the wrong tool, the screws can be in very tight and I have heard of folk giving up at this point.
I only had a cheap socket set but with a bit of effort they could be loosened. A bit of sandpaper or the like scrunched up and put in the socket so the T25 bit protrudes more than normal helps it grip the screw better as you can put some downward force on it.
"Hold on" I hear you say, "mine doesn't look like that, there is a black plastic bit in the way." And indeed there is. This bit.
Not a great photo as you can't see the bottom of it but if you could you would see the socket I was using wouldn't fit because the black plastic bit was in the way. If you have a proper T25 Torx screwdriver, as I had for the T10 size, you probably don't need to do the next bit but if you don't have the proper tools this is the trick.
With a small screw driver lever up the little bit of plastic on the right and pull the black plastic bit towards you at the same time. (Compare the two photographs above to see the difference - but no prizes for spotting it, this isn't a competition) Do the same on the other side and then pull the whole bit away - it has two springs on the back but they were captive. They may not be on yours so don't blame me if they go "ping" and disappear down a mouse hole. Just take things carefully and doing it when the plastic is warm so there is less chance of breakage due to it being brittle would be sensible.
And that is it. When all four T25 screws have been removed the two parts of the rooflight will come apart and you can then take them and give them a good wash in the bath - they were too big for the kitchen sink.
When reassembling, and mindful the T25 screws can get seized I thoroughly dried the inside of the little pillars with a hair-drier. This will hopefully ensure the screws do not corrode and expand. In hindsight I think you would be wise to replace the T25 screws before washing the upper bit to reduce the amount of water getting in.
Reassembly was, as they say is a reverse of disassembly, the only small trick was when replacing the arms on the T10 pillars pull the handle down just a fraction so the arms rotate enough to slip on past the stop which is moulded onto the pillar.
